I find that with most cuts, especially the intricate ones, that a heavier weight cardstock works much better.
Because of the varied sizes of photos, I used the Real Dial Size key when I specifically wanted an embellishment cutout to be a certain size.
For this layout I used the Winter Woodland cartridge
For the Santa Claus I used the Simply Charmed cartridge
Specifics
Blade Depth: 2
Pressure: High
Speed: Med
To begin, I used a heavy piece of cardstick for the "anchor" page. The printed background paper was too light to use alone.
Using the Zots Clear Adhesive Dots very sparingly, I affixed the large background page to the heavy cardstock.
For the various photos I used a Snowflake for a background, sizing each one to be just a bit bigger than the picture.
Here is an example of a layout for one of the photos.
- I used <Snowflk4>, page 35.
- Shadow/Blackout key
- Real Dial Size key
- NO shift key.
Here is an example of one of the Snowflake embellishments. To keep the sizing correct for each piece I didn't use the Real Dial Size, just set the size for 3 1/2". The Cricut Machine sizes accordingly: I combined a bit on this design:
- Use <Snowflk1>, page 32
- Shadow/Blackout, No Shift key, for the larger background.
- For the angular background, use <Snwfl4-s>, page 35
- Shift Key.
- For smaller background, use <Snowflk4>, page 35
- No other keys.
- For snowflake itself, use <snowflk4>, page 35
- Layers Key
The Santa was so much fun to make. I made him 2" size. If you don't have the Simply Charmed Cartridge, a stamp could be used.
- Use <Santa>, page 64. Simply Charmed Cartridge
. Make each part according to the directions on the page.
- Layer 1, No Shift Key
- Layer 2, No Shift Key
- Layer 3, No Shift Key
- Layer 4, No Shift Key
- Shadow, No Shift Key
- Use <Cap>, page 48. Winter Woodland Cartridge
- <Cap>, page 65, Shadow/Blackout Key, No Shift Key
- <Cap>, page 65, No other keys
- <Cap-s>, page 65, Shift Key
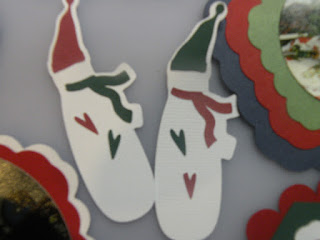
- Use <Gloves>, page 49. Winter Woodland Cartridge
- <Gloves>, page 48, Shadow/Blackout
- <Gloves>, page 48, No Other Keys
- <Gloves-s>, page 48, Shift Key
- <Gloves>, page 48, Layers Key
- Use <Snwoman>, page 47, Winter Woodland Cartridge
- <Snwoman>, page 48, Shadow/Blackout
- <Snwoman>, page 48, No Other Keys
- <Snwoman-s>, page 48, Shift Key
- <Snwoman>, page 48, Layers Key
I used the Simply Charmed Cartridge for the candycanes and the sentiment "Merry Christmas"
- <CandyCne>, page 63
- <CandyCne>, page 63, Layer 1, No Shift Key
- <CandyCne>, page 63, Layer 2, No Shift Key
- <CandyCne>, page 63, No Other Keys
- Merry Christmas, page 64, Size 1". You cut two so that one can offset the other with colors
- <Santa>, page 64, Real Dial Size Key, Word Key
- <Santa>, page 64, Real Dial Size Key, Word Key, Shift Key
I sincerely appreciate your visit to my blog and I thank you; please continue to follow in the future.


No comments:
Post a Comment
I enjoy comments, they let me know how I'm doing.