Sorry this is late, I became involved trying to become a follower of the brand new Cricut Blog. Go check it out, there are prizes being given away too. The New Official Cricut Blog
Now for today's card: I made this card to celebrate the 50th birthday. I was tempted to use the traditional black and white but decided to celebrate rather than mourn turning 50 years old. I think the rich vibrant colors of the cardstock background along with the sentiment "Hooray for you" look great on this card I made with my Cricut Personal Cutting Machine. Scrapbooking has come a long way in regard to cardstock choices. It used to be that you had a choice of plain colors or some not so special patterns and you had to cut your shapes by hand or with simple plastic shape patterns.
The Cricut machine allows your creativity to soar, with so many choices of cutouts; hundreds are included in most single cartridges. Take the time to look at the various patterns on each page of the Cricut booklet included with each Cricut cartridge. There are times when a pattern can be used for something other than it's intended purpose.
Phrases
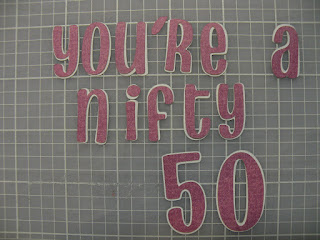
Don't be limited to the phrases included pre-done in the Don Juan cartridge. This cartridge includes the cutouts for every letter of the alphabet, giving you the opportunity to make up your own special phrases, as I did in this "Nifty Fifty" card. By using the Shadow key, any letter you choose can have it's shadow layer for underneath.
Cardstock
Specifics
- Cricut Cartridge: Don Juan
This cartridge usually is included with a Cricut Machine purchase.
- Blade Depth: #2
- Pressure: Max
- Speed: Medium
Step by Step
Step 1
Cut a background piece of cardstock to measure 4" x 5 1/4" for a card that measure 4 1/4" x 5 1/2". For any card, simply cut the background to be 1/4" smaller than the card itself. Adhere the background cardstock to the card base.
Step 2
Cut one <K> pg 42, size 4" using the Under Pressure, Shift, and K keyboard key. This cuts the top layer of the big star in the middle. I used a contrasting piece of cardstock.
Step 3
Adhere the large star offset to the right on the card.
Step 4
Cut one <Hooray>, pg 72, size 2 1/2", using just the Hooray keyboard key. This cuts out the top Hooray layer.
Cut one <Hooray>, pg 72, size 2 1/2", using Shadow and Hooray keyboard key. This cuts out the bottom Hooray layer. Adhere the two together.
Step 5
Adhere to the bottom left of the card.
Step 6
Cut one <Star>, pg 42, size 1", using the Shift and K keyboard key. This cuts the top layer of the smaller star.
Cut one <Star>, pg 42, size 1", using the Under Pressure and K keyboard key. This cuts the bottom layer of the smaller star.
Step 7
Adhere the two star layers together and adhere to the top left of the card.
Step 8
Cut one <Hooray> pg 72, size 1 1/2", using Shadow, Shift and Hooray keyboard key. This cuts out the bottom layer of the !
Cut one <Hooray>, pg 72, size 1 1/2", using the Shift and Hooray keyboard key. This cuts out the top layer of the ! Set aside.
Step 9
Pick the sentiment you want. For the sentiment I used, I cut each letter to be a size 1" using each keyboard key needed. Then using the Shadow key along with the appropriate letter key, cut out the shadow version. Look at the letter choices, each letter has a couple of cutout choices.
Step 10
Adhere each letter and it's shadow together, then adhere them to the card.
Step 11Add a pretty bow, available at scrapbook supply stores.
I sincerely appreciate your visit to my blog and I thank you; please click on the "become a follower" link to continue to follow in the future.


I love that paper stacker!! You really rocked it!
ReplyDeleteThere are so many paper stackswith beautiful textured papers. I notice the heavier weights cut cleaner too. Thanks for your comment
ReplyDelete