Graduation is such a happy time. Buying a graduation card takes time and expense to find just the right one, then it is one of thousands of the same card, pretty but not really special. A Cricut Machine allows you to create beautiful, homemade cards for any occasion and you can add special touches.
I created a custom Graduation card, easy to make, with my Cricut Personal Cutting Machine and the Don Juan & Sentimentals cartridges. I decided to use the school's colors and add a graduation photo of the graduate to the card for that extra special, custom look.
It was very easy and customizable for your graduate; for instance, you could substitute Congrats for Happy and so forth.
Cards and Scrapbook Layouts are a breeze, very easy to design and cut using the Cricut Cutting Machine.
Specifics
Cricut Cartridge: Don Juan This cartridge is generally included in the purchase of your Cricut Personal Cutting Machine
Blade Depth: #2
Pressure: Max
Speed: Medium
Medium Weight Cardstock for intricate cutoutsStep by Step
Using: Sentimentals cartridge:
Step 1
Cut one <Frame3>, pg 29, Size 4" for a 3 x 2 1/2" Photo, using Shadow and Frame3 keyboard key. Cuts the bottom layer of photo frame.
Step 2
Adhere the bottom layer cut to the middle right side of your cardstock base card.
Step 3
Cut one <Frame3>, pg 29, Size 4" for a 3 x 2 1/2" Photo, using just Frame3 keyboard key. Cuts the middle layer of photo frame.
Step 4
Adhere the middle layer cut on top of the bottom layer cut.
Step 5
Adhere your photo to the middle layer cut.
Step 6
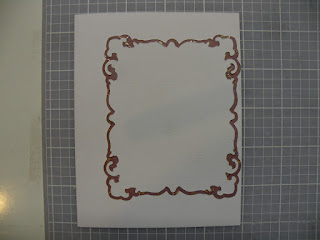
Cut one <Frame3>, pg 29, Size 4" for a 3 x 2 1/2" Photo, using Layer and Frame3 keyboard key. Cuts the top intricate layer of photo frame.
Step 7
Adhere the Intricate layer around the photo. Take care to line up outer cutouts with the middle layer cutout.
Using the DonJuan Cartridge:
Step 8
Cut one Congrats sentiment, size 1/2" using Marquee and each appropriate keyboard key. Adhere each letter to the top (Congrats). I applied my gluestick to the entire top of the card, then placed and arranged the letters evenly.
Step 9
Cut one Graduate sentiment, size 1/2" using Marquee and each appropriate keyboard key. Adhere each letter to the left side (Graduate). I applied my gluestick to the entire left side of the card, then placed and arranged the letter evenly.
Step 10
Cut each number (2011), Size 3/4", using each appropriate number key.
Cut each number (2011), Size 3/4", using Shadow and each appropriate number key.
Step 11
Adhere the top number cutout to the shadow cutout.
Step 12
Adhere the 2011 cutout to bottom of the card.
I sincerely appreciate your visit to my blog and I thank you; please click on the "become a follower" link to continue to follow in the future.


No comments:
Post a Comment
I enjoy comments, they let me know how I'm doing.